
 Starting: 1st of Every Month
  +91 8409492687 |
  Contact@DevOpsSchool.com
In this tutorial we’re going to learn top security checklist for Lampp server. In this tutorial we have to learn lots of security checklist for lampp server, so lets follow this tutorial for lampp security configuration.
1. Keep Linux Kernel and Software Up to Date
Make sure you check for regular updates to keep the Linux server secure. New patches can address newly discovered vulnerabilities to evaluate security flaws. Unfortunately, many Linux users cannot implement these updates. As a result, the server can become vulnerable and easy to hack. Consider automating the process if you’re having trouble keeping up with the required security updates.
Security thread if i ignore Software Up to Date
Ignoring software updates in Linux can pose a serious security threat to your system. Software updates often include security patches that fix vulnerabilities in the software. If you do not install these updates, attackers can exploit these vulnerabilities to gain access to your system or steal your data.
Here are some specific examples of the security threats that you may face if you ignore software updates in Linux:
- Malware infection: Attackers can exploit vulnerabilities in outdated software to install malware on your system. Malware can steal your data, damage your system, or even take control of your system.
- Data breaches: Attackers can exploit vulnerabilities in outdated software to gain access to sensitive data on your system, such as passwords, credit card numbers, and personal information.
- Denial-of-service attacks: Attackers can exploit vulnerabilities in outdated software to launch denial-of-service attacks against your system. These attacks can make your system unavailable to you or other users.
Example :-
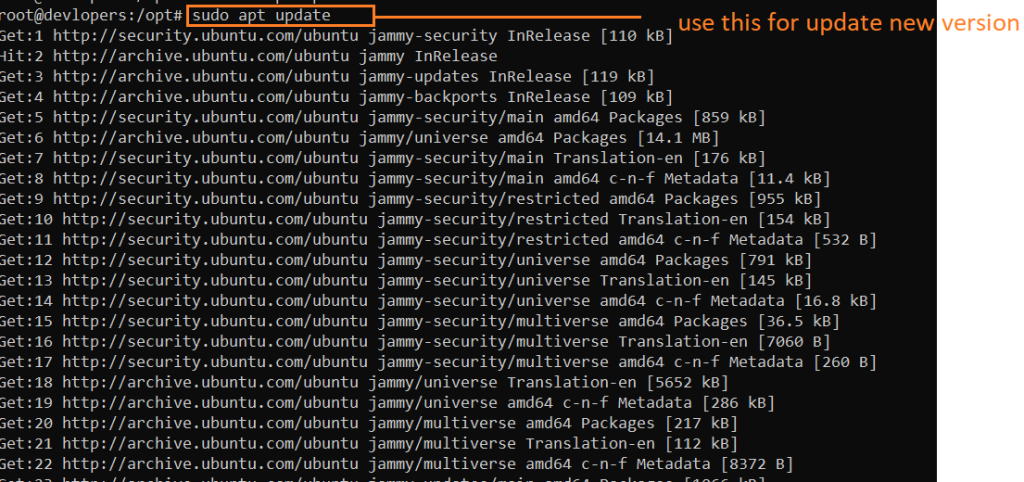
sudo apt update
sudo apt-get install unattended-upgrades
2. Add user permissions for privileged operations on the system
The sudo command allows users to run commands with the privileges of another user, typically the root user. To add a user to the sudo group, you can use the following command:
useradd sumitSet password
passwd sumit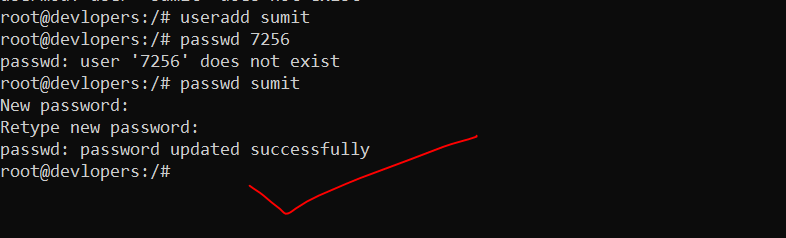
3. Disable USB usage
Depending on how critical your system is, sometimes it’s necessary to disable the USB sticks usage on the Linux host. There are multiple ways to deny the usage of USB storage; here’s a popular one:
Security reason if i don’t do Disable USB usage
There are a few security reasons why you might want to disable USB usage in Linux:
- USB drives can be used to spread malware. Attackers can create malicious USB drives that contain malware, such as viruses or trojans. When a user plugs in the USB drive and opens a file on it, the malware can be installed on the user’s computer.
- USB drives can be used to steal data. Attackers can create malicious USB drives that contain code that can steal data from a computer, such as passwords, credit card numbers, or other sensitive information. When a user plugs in the USB drive and opens a file on it, the code can be executed and the data can be stolen.
- USB drives can be used to gain unauthorized access to a computer. Attackers can create malicious USB drives that contain code that can give them unauthorized access to a computer. For example, the code could exploit a vulnerability in the computer’s operating system to give the attacker root privileges.
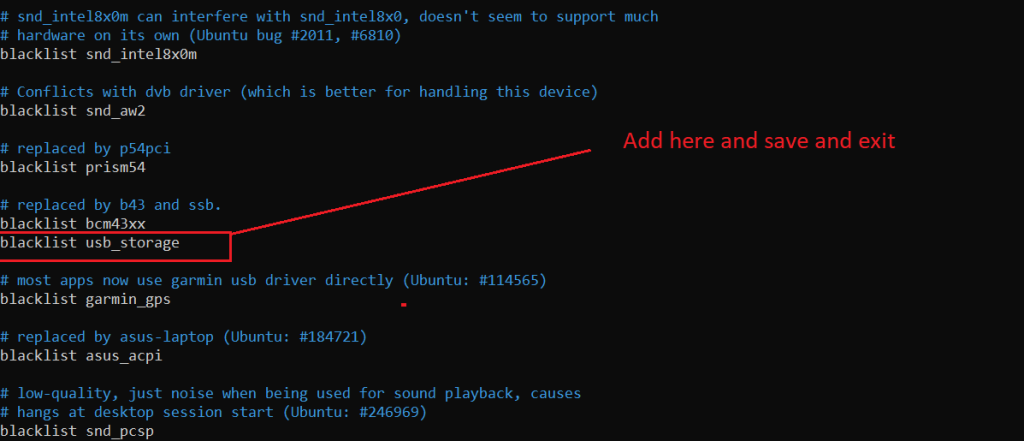
Open the “blacklist.conf” file using your favorite text editor:
nano /etc/modprobe.d/blacklist.confWhen the file opens, then add the following line at the end of the file (save and close):
blacklist usb_storage
After this, open the rc.local file:
4. Configure firewall
What is Firewall and Allow Necessary Ports ?
Enabling a firewall and allowing necessary ports are security measures to control and regulate network traffic to and from your computer or server. Firewalls act as a barrier between your system and the internet or other networks, helping to prevent unauthorized access and securing your system.
Why We need to do this Firewall Ports ?
Enabling a firewall and managing open ports is a crucial aspect of securing your computer or server. Here’s why managing firewall ports is important:
- Security:
- Unauthorized Access Prevention: Firewalls help prevent unauthorized access to your system by blocking incoming connections that are not explicitly allowed.
- Network Segmentation: By controlling which ports are open, you can segment your network and limit exposure to potential security threats.
- Protection Against Exploits:
- Exploit Prevention: Firewalls protect your system from potential exploits and attacks by controlling which services and ports are accessible.
- Controlled Access to Services:
- Service Restriction: You can control which services are accessible from the network. For example, you may allow access to web services (HTTP and HTTPS) but restrict access to certain administrative services.
Security thread if i ignore this Firewall and Allow Necessary Ports ?
If you ignore your firewall and allow necessary ports, you could be putting your system at risk of a number of security threats, including:
- Malware attacks: Malware can exploit open ports to gain access to your system and steal your data, install malware, or launch denial-of-service (DoS) attacks.
- Unauthorized access: Attackers can use open ports to gain unauthorized access to your system and steal your data, or launch attacks against other systems on the network.
- DoS attacks: DoS attacks can overwhelm your system with traffic, making it unavailable to legitimate users.
- Man-in-the-middle attacks: Man-in-the-middle attacks allow attackers to intercept and modify communication between your system and other systems on the network.
Example :-
sudo ufw allow 80
sudo ufw allow 443
sudo ufw enable
5. Install Fail2ban
What is Fail2ban ?
Fail2ban is an intrusion prevention software framework in Linux that monitors system logs for malicious activity and scans files for any entries matching identified patterns. If Fail2ban detects a spike of failed login attempts, it will automatically add new firewall rules to your iptables and block the source address for a specified time or indefinitely. This helps to protect your server against brute-force attacks, denial-of-service attacks, and other types of malicious activity.
Security thread if i ignore this Fail2ban
Ignoring Fail2ban in Linux can pose a serious security threat to your system. Fail2ban is a software that helps to protect your system from brute-force attacks, denial-of-service attacks, and other types of malicious activity. If you ignore Fail2ban, your system will be more vulnerable to these attacks.
Here are some of the security threats that you may face if you ignore Fail2ban in Linux:
- Brute-force attacks: Attackers can use brute-force attacks to try to guess your passwords. If you ignore Fail2ban, attackers will be able to attempt to guess your passwords without any restrictions. This can lead to your account being compromised.
- Denial-of-service attacks: Attackers can use denial-of-service attacks to flood your system with traffic, making it unavailable to legitimate users. If you ignore Fail2ban, attackers will be able to launch denial-of-service attacks against your system without any restrictions. This can make your system unavailable to you and other users.
- Other types of malicious activity: Fail2ban can also be used to protect your system from other types of malicious activity, such as port scanning and malware infections. If you ignore Fail2ban, your system will be more vulnerable to these types of attacks.
Example :-
sudo apt-get install fail2ban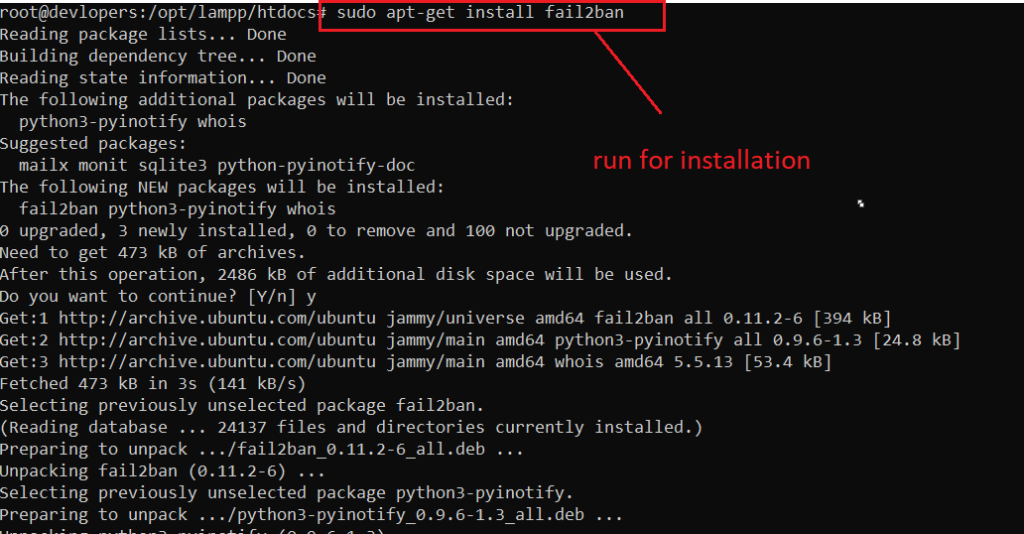
Create a copy of the default configuration file so you can safely make changes without them being overwritten by system upgrades:
sudo cp /etc/fail2ban/jail.conf /etc/fail2ban/jail.localEdit the jail.local file:
sudo nano /etc/fail2ban/jail.local
The [sshd] block should look like the following one:
[sshd]

enabled  = true
port     = ssh
filter   = sshd
logpath  = /var/log/auth.log
maxretry = 5
bantime = 600
6. Install and enable mod_security
What is Mod-security2 ?
ModSecurity, often referred to as mod_security or mod_security2, is an open-source web application firewall (WAF) module that is typically deployed with the Apache HTTP Server. It provides a set of tools for monitoring and securing web applications by applying various security rules and policies.
Why We need to do this Mod-security2 ?
Implementing ModSecurity, or ModSecurity2, is beneficial for several reasons, especially when it comes to enhancing the security posture of web applications and protecting against various cyber threats. Here are some key reasons why organizations use ModSecurity:
- Protection Against Web Application Attacks: ModSecurity acts as a web application firewall (WAF), providing protection against a wide range of web application attacks, including SQL injection, cross-site scripting (XSS), and other common vulnerabilities. It helps to filter malicious traffic before it reaches the web application.
- Prevention of SQL Injection and Cross-Site Scripting: SQL injection and XSS are common attack vectors where attackers attempt to inject malicious code into web applications. ModSecurity can detect and prevent these types of attacks by analyzing and filtering incoming requests.
- Security Compliance: Many regulatory standards and security best practices recommend or require the implementation of a WAF for web applications. ModSecurity helps organizations achieve and maintain compliance with standards such as PCI DSS (Payment Card Industry Data Security Standard) and others.
- Real-time Monitoring and Incident Response: ModSecurity provides real-time monitoring of web traffic and logs security events. This allows security teams to analyze and respond to incidents promptly. The detailed logging helps in identifying the nature of attacks and understanding the security posture of the web application.
Security thread if i ignore Mod-security2
If your’re Ignoring ModSecurity2 then your web applications vulnerable to a range of security threats. Here are some potential security threats and risks associated with not using ModSecurity2:
- SQL Injection Attacks: Without a WAF like ModSecurity, your web applications may be susceptible to SQL injection attacks. Attackers can inject malicious SQL queries into input fields, potentially leading to unauthorized access, data manipulation, or data theft.
- Cross-Site Scripting (XSS) Attacks: XSS attacks involve injecting malicious scripts into web pages viewed by other users. Without protection, your applications may be vulnerable to these attacks, which can lead to session hijacking, defacement, or the theft of sensitive information.
- Cross-Site Request Forgery (CSRF) Attacks: CSRF attacks involve tricking a user’s browser into making unintended requests. ModSecurity can help detect and prevent these attacks by validating and blocking malicious requests.
- Security Compliance Violations: Many regulatory standards and compliance requirements mandate the use of a web application firewall. Ignoring ModSecurity may lead to non-compliance with standards such as PCI DSS, exposing your organization to potential legal and financial consequences.
Installation of ModSecurity:
sudo apt install libapache2-mod-security2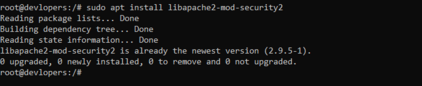
Run below code
sudo a2enmod security2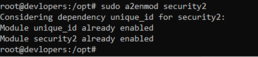
nano /etc/apache2/mods-enabled/security2.conf<IfModule security2_module>
# Default Debian dir for modsecurity's persistent data
SecDataDir /var/cache/modsecurity
# Include all the *.conf files in /etc/modsecurity.
# Keeping your local configuration in that directory
# will allow for an easy upgrade of THIS file and
# make your life easier
IncludeOptional /etc/modsecurity/*.conf
# Include OWASP ModSecurity CRS rules if installed
IncludeOptional /usr/share/modsecurity-crs/*.load
</IfModule>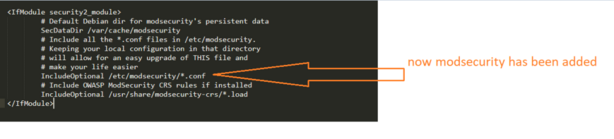
sudo mv /etc/modsecurity/modsecurity.conf-recommended /etc/modsecurity/modsecurity.conf

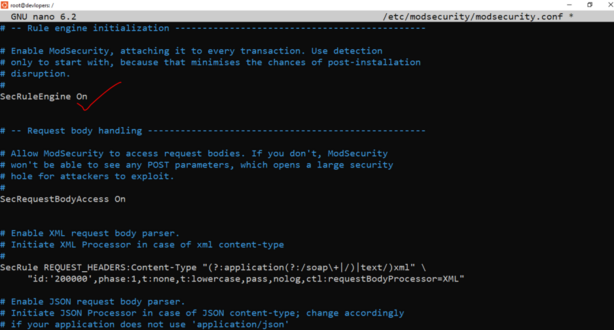
sudo nano /etc/modsecurity/modsecurity.conf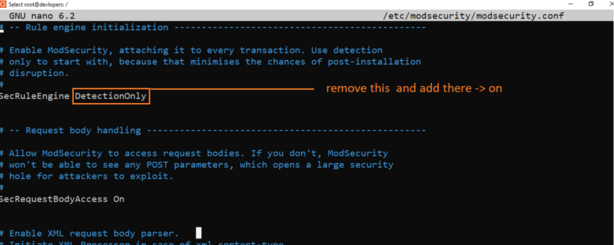
7. Hide PHP basic information
The first step is to hide the information provided by PHP which some attackers may find useful. Open the php.ini file and change the settings to match the following:
expose_php = Off
display_errors = Off
mail.add_x_header = Off
Save the file and restart Apahce:sudo systemctl restart apache2.service
8. Set maximum execution time
Go to php.ini and do change the following settings:
max_execution_time = 30
max_input_time = 30
memory_limit = 40M
Ignoring the maximum execution time in Linux can pose a serious security threat to your system. The maximum execution time is a limit on how long a script or program can run. If you ignore the maximum execution time, a malicious script or program can run indefinitely, consuming system resources and potentially harming your system.
Here are some of the security threats that you may face if you ignore the maximum execution time in Linux:
- Denial-of-service attacks: Attackers can use denial-of-service attacks to flood your system with long-running scripts or programs, making it unavailable to legitimate users. If you ignore the maximum execution time, attackers will be able to launch denial-of-service attacks against your system without any restrictions. This can make your system unavailable to you and other users.
- Resource exhaustion attacks: Attackers can use resource exhaustion attacks to consume all of the system’s resources, such as CPU time and memory, making it unavailable to legitimate users. If you ignore the maximum execution time, attackers will be able to launch resource exhaustion attacks against your system without any restrictions. This can make your system unavailable to you and other users.
- Malware infections: Malware can often be disguised as scripts or programs. If you ignore the maximum execution time, malware can run indefinitely on your system, causing damage and stealing data.
9. Enable automatic updates
Enabling automatic updates in Ubuntu is a good practice to ensure that your system is always up-to-date with the latest security patches and software updates. Ubuntu provides a tool called unattended-upgrades to facilitate automatic updates. Here’s how you can enable it:
To enable automatic unattended upgrades you should install the unattended-upgrades package.
Example :-
sudo apt-get install unattended-upgrades
10. Hide the Apache Version number, and other sensitive information
It is essential to hide the Apache Version Number your server is running, as well as other sensitive information. You can do this by following the simple steps listed below.
Add or Edit the following two directives in your httpd.conf file
ServerSignature Off
ServerTokens Prod
<Directory /var/www/html>
Options Indexes FollowSymLinks
AllowOverride None
Require all granted
ServerSignature Off
</Directory>The ServerSignature appears on the bottom of pages generated by apache such as 404 pages, directory listings, etc.
The ServerTokens directive is used to determine what Apache will put in the Server HTTP response header. By setting it to Prod it sets the HTTP response header as follows:
Thanks for learning … 